How to Get Great Prints | Printing for Photography Competitions and Distinctions
One of the benefits of belonging to a recognised photography Institute (by that I mean the BIPP, RPS, FSWPP or MPA) is access to a respected distinction programme. I’ve briefly talked about distinctions/qualifications in a previous post but what I haven’t talked about is how to prepare for a photography qualification. For now I thought I’d have a chat about printing.
Incidentally I’ve talked about photography distinctions in this article: BIPP Fellowship and other Distinctions
** If you’re a non-professional photographer, printing your pictures at home for fun, then you may not have time for the nitty gritty of colour management. If that’s you, see the last section of this article.
The aforementioned institutes normally allow Licentiate and Associate distinction panels to be submitted in digital format. However that bypasses one very important aspect of image making - print quality. The overwhelming majority of professional photographers will supply their clients with printed images in the form of wall pieces and albums. Therefore understanding print output is crucial. If we can’t show the distinction judges our entire workflow then we’re arguably reducing our chances of passing. This is borne out in the failure statistics - a printed panel is much more meaningful and has significantly more impact than a digital submission.
Creating a perfect print (or as perfect as we can get it) can be a real challenge. Creating a ‘good’ print is one thing, but an exceptional print can be on a wholly different level. Without an understanding of the output process it’s all too easy to end up with prints which don’t match the image we see on our computer monitor. We take control of that by operating a colour managed workflow. In essence this means controlling the colour profile and bit depth from capture to print. Those stages will encompass how we shoot (JPEG or RAW), monitor calibration, workflow colour space and bit depth, and profiling for final output (be that for web or print). There are plenty of excellent articles on the internet covering all of those things so I’m not going to delve into that today.
My own workflow involves shooting in RAW and processing those images within the 16 bit Prophoto colour space in Adobe Lightroom and Adobe Photoshop. Final output to a commercial print lab almost always involves then converting to an 8 bit sRGB file. I usually print my own images for distinctions so I’ll be using the correct ICC profile for my paper type, ink type, and printer. Depending on which printer I’m using I’ll often print directly from a 16 bit Tiff file which remains in the Prophoto colour space. The latter only really being viable if the printer itself is capable of outputting a colour gamut broader than sRGB, where the additional colours and tones can then be harnessed.
As we know, each pixel in a photograph comprises one colour which is created from R, G, and B values. The wide gamut colour spaces don’t have “more” colours, that is an attribute of the encoding (8 bit/16 bit/24 bit) or ‘bit depth/colour depth’. It’s important to distinguish between colour space and bit depth. Think of colour space as a container, where some containers are bigger than others. Think of bit depth as the colour values which can be distributed across that container.
Many will argue that there is no visual advantage to printing from a 16 bit Prophoto image, but I’ve compared some photographs where I do see a benefit (mostly in coloured shadow areas). It’s worth trying it to see for yourself.
A word about eyes. The years can pass by in a flash and it’s all too easy to forget when we last had our eyes tested. Even small changes can affect how well we can see small details, or micro-contrast. Most people over 40 will need reading glasses, or an upgrade to varifocals if they’re an existing wearer. I was once in the judging room of a well known photography institute and one of the judges accused a candidate of ‘poor processing’ when in fact he was looking at the heat haze from a motorcycle exhaust. I put it down to his eye sight rather than poor understanding of the subject, though I could be wrong.
If you’re a contact lens wearer you’re likely to suffer from a loss of micro-contrast. I know that when I’ve processed photos wearing my contacts I’ve ended up applying too much contrast and I’ve shifted the black point too far. This is mostly because contact lenses will naturally accumulate a film of debris and body oils, or dryness, all of which affects our visual acuity.
What I said in the preceding paragraphs will be obvious to many of you. What I’m about to say is often overlooked. Here are a few more things to consider:
The Correct Print Size for Photography Distinctions
If you’re entering your work for competitions or distinctions the awarding body will have a set of submission guidelines. These guidelines will tell you the maximum and minimum size for each print and the size of its mount or border. The photograph itself will usually have to occupy a minimum size within that border. The minimum is normally 10” x 8” according to its long or short side, and the overall size including the mount is usually A3/16x12.
What if your photographs are all cropped for the best composition and are all different in aspect ratio? This isn’t a problem at all, it just needs a little bit of planning. Normally a distinction panel is displayed as two or three rows of mounted prints. Some institutes will allow you to present your work in a printed leather bound professional portfolio, as you would to a client. Either way, the images need to run in a coherent and logical order and they need to be visually balanced.
When I create a distinction panel I’ll normally decide to use two or three pre-determined aspect ratios, based on the initial crop of the images. That way one of those aspect ratios is bound to suit every print in the collection. Since the photographs sit side-by-side in their row the landscape photographs will all be the same height and the portrait orientation photographs will also be the same height. There may however be images which work best in more of a letterbox orientation. There will always be even numbers of landscape, portrait or letterbox images. The portrait and letterbox photographs will be placed carefully in the running order for ideal symmetry and visual weight.
All of this is made immeasurably easier if you design your running order by printing out your panel images at a small size (for example 6 inches on their longest side) and then lay them out on the floor. This way you can juggle them around until you’ve got the order you want. You’ll see straightaway that some images draw the eye more immediately than others. You may want to place those images either in the centre of your running order or at the start and end of each row. Laying out a series of mini prints in this way will also help you to determine if any images would benefit from a little tonal adjustment to help them flow better with the pictures on each side.
Here’s an example of how I would lay out a distinction panel:

Symmetry and balance are vital components of any qualification Panel
Choose the Best Paper for your Prints
The paper you choose is vital. Whilst you might have a personal preference for one paper type (or “substrate”) that paper may not suit every image, or the purpose of that image. There is an overwhelming raft of paper types out there made by several well-known manufacturers. We often find ourselves testing dozens of papers before we find the ones we like. I’d recommend always having four paper types in your cupboard which you can rely on.
When choosing your substrate bear in mind that some papers have less dynamic range than others, depending on how they’re coated. Very matte papers can show less colour saturation and less black than glossy papers (some papers also tend to need more output sharpening). A matte art paper is however a forgiving substrate - it can be a good choice for images where there is some noise, or which suit a more artistic form of output.
Black-and-white photographs can look fantastic on a baryta paper which has a soft sheen and a slight texture. Gloss papers can show up imperfections and noise and unless we’re careful blacks can appear blocked or ‘crushed’. Textured papers can give the perception of more detail. I’ve seen some otherwise strong distinction panels fail because the paper type was inappropriate.
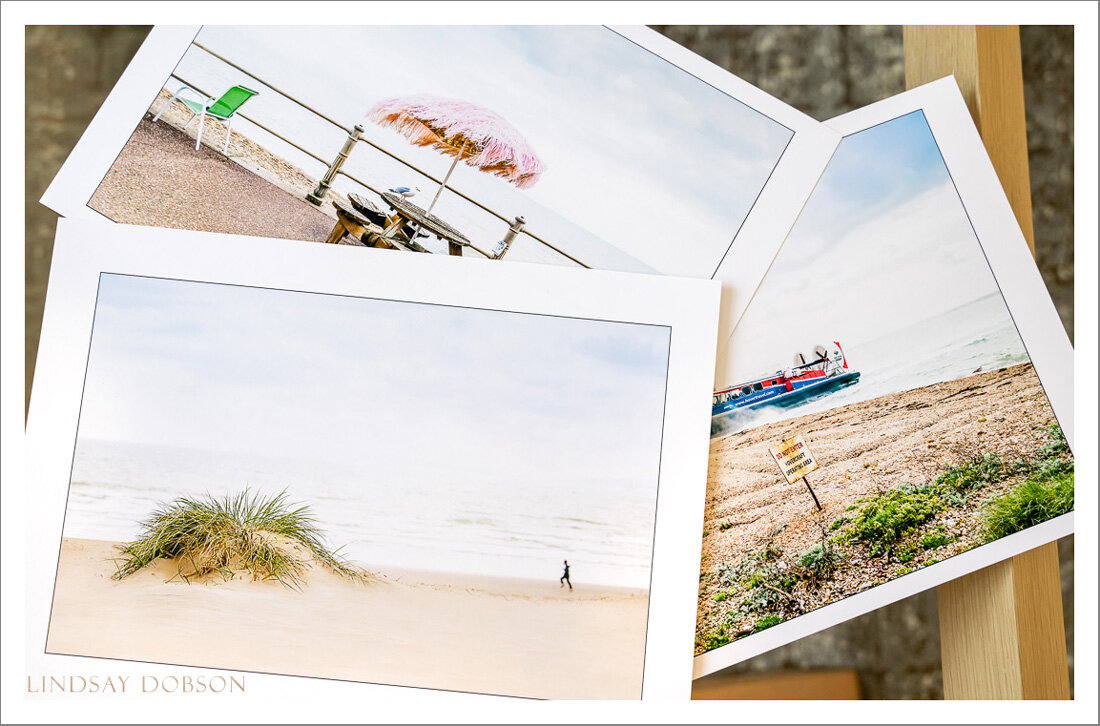
The base colour of the paper is also crucial – base tones can vary from bright white to quite a warm ivory. This will affect how the coloured pigments laid down by the printer are reproduced, and how white any white objects will appear. At the moment I’m nearing completion on a very long coastal photography project and I’ve chosen the brightest white art paper in my inventory. I want the colours to be pure and crisp, rather than muted and subtle.
Hahnemuhle Matte Fine Art Photo Rag is a fantastic art paper and an absolute classic. Photospeed have a lovely range, NST Bright White is a quality matte art paper with a very slight texture. A paper I love and use a great deal in my business is the Canon Professional Matte Paper (both the bright white and the off white versions) - when combined with Canon pigments and my Canon printers the results are stunning. Be aware that with some matte papers the fine nuances of shadow detail can be difficult to reproduce, unless you’re wanting more of a painterly feel.
It can be useful to soft proof in your editing software with the paper profile you’ll be using, to get an idea of how the image will look when printed. Soft proofing is something of a guide though, nothing beats test prints.
Choose the right paper
Take time to match the print to the paper type - some images will work best on a matte art paper and others will be better suited to a lustre-based substrate
Properly Prepare for Printing a Distinction Panel
This may sound simplistic and overly practical, but I’ve seen people come unstuck just before their prints are needed by whichever Institute will be assessing them. For goodness sake make sure you’ve ordered enough paper and pigment at the very beginning! There’s nothing worse than thinking you’ve covered yourself only to run out of paper or ink a week before your prints are due for delivery to the judges. As a general rule I tend to order at least three times as much as I think I’ll need. For competitions or distinctions I will on average create three prints for any given image. The same applies if printing through your favourite laboratory - give yourself a few weeks breathing space if you can, just in case you need a few more test prints or tweaks.
You might be wondering why I prefer to print my own work rather than use one of the excellent professional laboratories. It simply comes down to control and convenience. My laboratories do a fantastic job, but prints on art paper are very expensive. They fall into the ‘hand-printed’ category rather than the automated category which would apply when ordering a batch of prints using classic type C lustre paper. Each time we need a test print or each time we want to tweak something, we have another set of fees and postage charges to worry about. I find that nothing beats the satisfaction of outputting my own images. That does however demand an understanding of colour management and plenty of practice.
Depending on your chosen paper type, your image is likely to require some brightness, contrast, colour, and sharpening work. This is why we don’t print from our master files, because they’ll probably look a little dull. I find that when printing to the matte art papers I’ll need to add a small amount of contrast and I’ll lift the mid tones, a bit of saturation, quite possibly some individual colour channel work, and finally output sharpening. The sharpening aspect is an interesting one - often the right amount of sharpening for art paper can appear overdone when we view the image on screen prior to printing. It comes down to trial and error and of course the subject of the print itself. Sharpening is best done selectively and after all other adjustments including resizing.
In our processing software it can be helpful to view our image before printing by switching to a white background. A dark background can make our image appear brighter than it is (it can also mask white balance problems). In Adobe Lightroom clicking on the proofing checkbox just above the filmstrip in the Develop module changes the background to white. Pressing Shift + Tab gets rid of the tool panels.
When self printing, don’t assess your prints the moment they come out of the printer. The pigment or ink needs time to dry properly (this applies even to ‘instant dry’ pigment). Colours can subtly change, particularly when using fine art substrates, over a few hours. I tend to leave my prints for at least 24-hours before I form a final opinion on them.
The Best Way to View your Prints
In order to judge colour accuracy and tonality in any print we need to do so under fairly controlled conditions. We know that if we walk around our home carrying a print, that print can appear wildly different depending on the amount of light we have and the colour temperature of that light. Incandescent or fluorescent light sources can make colours appear to change, just as very bright or direct sunlight can make colours appear either vivid or washed out.
I try to maintain neutral lighting in my office wherever possible. That means no coloured walls and light sources which are as close to daylight temperature as possible. I also view my prints under an accurately daylight balanced light source in the form of my Falcon Eyes F1 portable LED light panel. This particular light isn’t cheap but the quality of the light is fantastic. It’s one of those lights which is a true multitasker. I use it as an accent light, a macro light, a video light, a light for zoom/skype calls, and as a daylight balanced print viewing light.
I also make a point of assessing my prints at the same time of the day and in the same place.
It’s possible to buy specially lit boxes/enclosures for viewing prints, and these are often used by the photography institutes when judging.

Bare prints or sleeves
If your prints are presented in clear acrylic sleeves (or in the case of my book ‘Sussex Coast’, behind an acrylic front cover) bear in mind that will add a little colour saturation
Assess Your Final Prints
It makes good sense to look at your final prints laid out as you would for display, rather than simply looking at each one as an individual entity. Prints which are next to each other can often look ‘wrong’ because the tonality isn’t complimentary, even though they’re in their correct position on the running order. Hopefully this kind of thing was mostly ironed out earlier on with the mini prints. However it isn’t unusual to make more tweaks and reprints at the last minute. A classic example would be an image which is fairly warm toned placed next to an image which is much cooler. As soon as those pictures are placed side-by-side the difference becomes far more obvious than if we were to pick them up and look at them on their own.
Some judges will recommend turning a print upside down - a sudden change of perspective can ‘reset’ our brains and immediately draw our eyes to imperfections and areas which may appear too bright.
Perhaps the most interesting part of printing (at least in my experience) is the tendency to notice imperfections in a print, which weren’t spotted in a digital file which has been looked at hundreds of times. For some reason a print will draw our eyes to anything which isn’t right. It’s also really important to scrutinise the edges and corners of our prints. Look for anything which might be intrusive or which is cutting through the borders. Banding in skies (a potential issue if you’ve been working your files in 8 bit mode) is also much more likely to show up in print. I would also recommend taking the time to look at the edges of the objects in the photographs, particularly high contrast edges. Often when we sharpen these areas can show a measure of artefacting, or haloing.
Checking we have enough detail in dark areas of the print is crucially important. This is why photographs which are significantly low-key don’t always suit output onto the matte art papers. If there is detail in the digital file there should be detail in the print (assuming that’s the intention). Importantly, when calibrating your monitor make sure the brightness is correct. If your monitor is too bright then your prints are likely to be too dark. If all else fails, it might be time to consider a different paper type. I find that very low-key photographs can work really well on a baryta or classic lustre paper. My Fellowship panel in animal portraiture contained a lot of black and in the end I printed to classic photographic C-type lustre paper - I wanted deep rich blacks and a punchy look.
All in all, printing for distinctions and competitions isn’t always a straightforward process even for professionals. Depending on how obsessive you are about your prints it’s easy to go back-and-forth mulling over the minor details between one test print and the next. I know from experience that we can drive ourselves mad doing this. Sometimes the best thing to do is take a break for a few days and then have another look at the prints.
I have a tendency to grow habituated to my own work very quickly. This can cause me to switch off mentally and to disconnect, meaning I feel little excitement each time I see the photographs I’ve taken. This can lead to a hypercritical mindset and a tendency never to be happy with anything. The only way round it is by taking breaks, be that for a few days or even a few months.
** Non-Professional Photographers Printing at Home for Fun
If you’re a casual snapper simply enjoying your hobby, then you may not want to get too involved in colour management. Admittedly it’s a big subject which can be overwhelming. That said, you still want to get fairly pleasing prints. You might be experiencing colour casts in your prints, prints which are too dark or too light, or banding in shadows or blue skies. Here are a few things to think about:
Start with your monitor. A good quality monitor with a decent resolution and good brightness values (and preferably a wide colour gamut) is an ideal starting point. Most of the online printing laboratories will have what is known as a calibration reference print. Ask them to send you a printed copy and download the digital copy. When the printed version arrives compare it to the digital version on your computer monitor. Do this in good natural light, and don’t wear any brightly coloured clothing which might reflect of your screen.
Adjust your monitor settings until the colour temperature closely matches the print. Go into your computer’s graphics card driver and make the changes there. If you can’t access that there may be buttons on your monitor. There are also basic colour calibration tools within Windows 10.
If your prints show banding in blue skies then it’s probably because you shoot in JPEG mode. This automatically records your photographs as 8 bit files. If you then try to process a JPEG image you can end up ‘stretching’ the colour and tonal values to the point where gaps start to appear in each colour channel. The best way to avoid this is not to mess with your JPEG pictures beyond a very small amount of brightening, or to learn to shoot in RAW and process in 16 bit.
Banding which is visible in shadow areas can be a result of the above, or it can be down to your printer.
How old is your printer? These days even fairly inexpensive printers can do a good job although the four ink variants can be prone to banding. When you print make sure you’re choosing the correct settings. If you’re not using a dedicated ICC profile (and most home users don’t) then your printer will be managing the colours, rather than your image editing software.
Go into your printer’s settings and select the paper you’re using (eg: gloss, lustre, matte, art paper etc). Select the print quality which best matches that paper type (your printer will probably automatically select that for you at this stage). Generally, lustre or gloss papers require a higher print quality setting than the more absorbent matte papers.
[If your colours are looking crazy, check to see if any of your ink cartridges have run out, or are about to run out. If your printer has built in print heads (rather than the print head being built into the cartridges) then the nozzles may be clogged. Run some cleaning cycles if needed. Printers with built in print heads need regular use (every few days) to keep them free from blockages].
Make a test print. If any of the colours look slightly ‘off’ there will usually be a section in your printer software where you can tweak the hue of those colours. This often happens if you’re using cheap third party inks, rather than the (comparatively over-priced) ink sold by your printer manufacturer.
If your print is too dark, chances are your monitor brightness is too high.
Lastly, in this post I’ve talked about what makes an image a competition-winning image.